In a previous article, we discussed how to set up GPU virtual machines using Synpse on Vultr. Now, let’s explore what we can do with these machines. In this article, we will use an affordable cloud GPU provider and quickly connect machines to Google Collab through Synpse.
By “affordable”, we look into A100 with costs such as $2.604/hr for 1 GPU or $20.833/hr for 8xA100 while on AWS an equivalent GPU is at $32.77/hr. And by “quickly” we mean that the setup takes only several minutes (2-4min depending on the OS boot time) so you can shutdown your machine when not needed and get one back for your next experiment without delay.
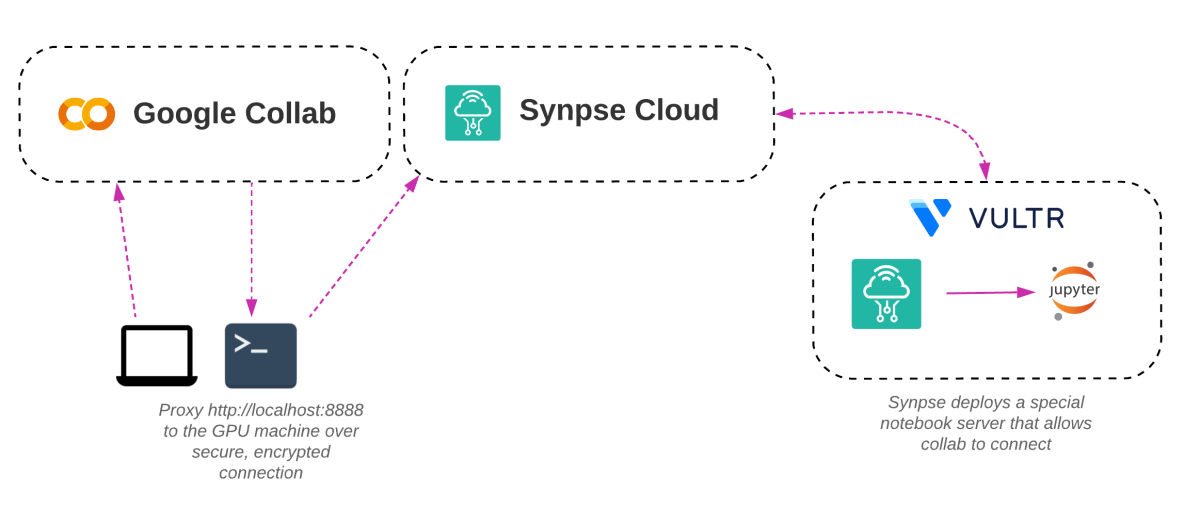
Our setup:

Prerequisites
- Synpse account (free)
- Synpse CLI - important!
- Vultr account
Step 1. Getting the VM
For detailed instructions on setting up a GPU server, refer to our previous article. It’s important to follow all the steps, as skipping any of them may result in the setup not working correctly.
Here is a quick summary of the process:
- From the Provision page on Synpse, copy the command for the Cloud-Init part of the VM creation.
- Create a GPU server and select the operating system you want to use (e.g. NVIDIA NGC).
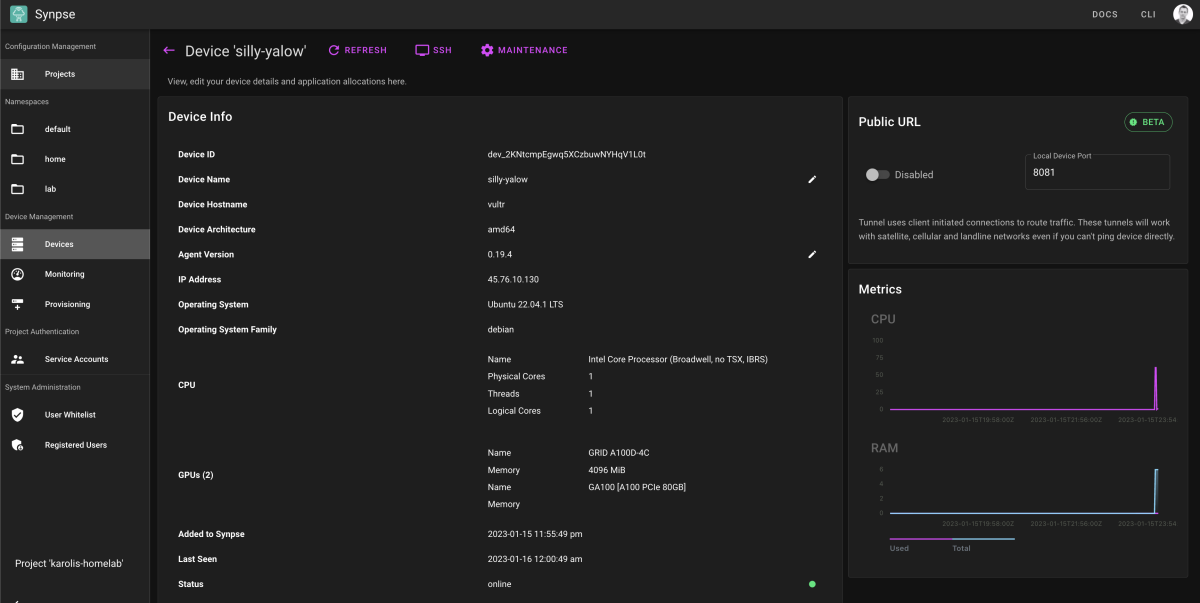
This will provision the VM with the Synpse agent and GPU drivers. It may take several minutes for the machine to be fully set up, and you can track the progress on the devices page of the Synpse dashboard

Step 2: Preparing the GPU VM
With the virtual machine running, we need to set up a Jupyter notebook that will enable the connection to Google Collab. On your terminal, use the synpse CLI by running the following command:
synpse deploy -f https://raw.githubusercontent.com/synpse-hq/synpse/main/samples/collab/collab-gpu.yaml
Running the command above will deploy a Jupyter notebook with GPU support. You should see logs like the following:
[I 23:13:57.796 NotebookApp] Serving notebooks from local directory: /tf
[I 23:13:57.797 NotebookApp] Jupyter Notebook 6.5.2 is running at:
[I 23:13:57.797 NotebookApp] http://b6edf5b8d4df:8888/?token=8bfcea50d8203266169c6f377bdbb28782ab2e6ece97c709
[I 23:13:57.797 NotebookApp]  or http://127.0.0.1:8888/?token=8bfcea50d8203266169c6f377bdbb28782ab2e6ece97c709
[I 23:13:57.797 NotebookApp] Use Control-C to stop this server and shut down all kernels (twice to skip confirmation).
[C 23:13:57.813 NotebookApp]

    To access the notebook, open this file in a browser:
        file:///root/.local/share/jupyter/runtime/nbserver-1-open.html
    Or copy and paste one of these URLs:
        http://b6edf5b8d4df:8888/?token=8bfcea50d8203266169c6f377bdbb28782ab2e6ece97c709
     or http://127.0.0.1:8888/?token=8bfcea50d8203266169c6f377bdbb28782ab2e6ece97c709
To forward the port to your local machine, run the following command on the terminal, and keep it running:
synpse device proxy <your device name> 8888:8888
This will open a tunnel from your local machine to the cloud VM, as long as the command is running.
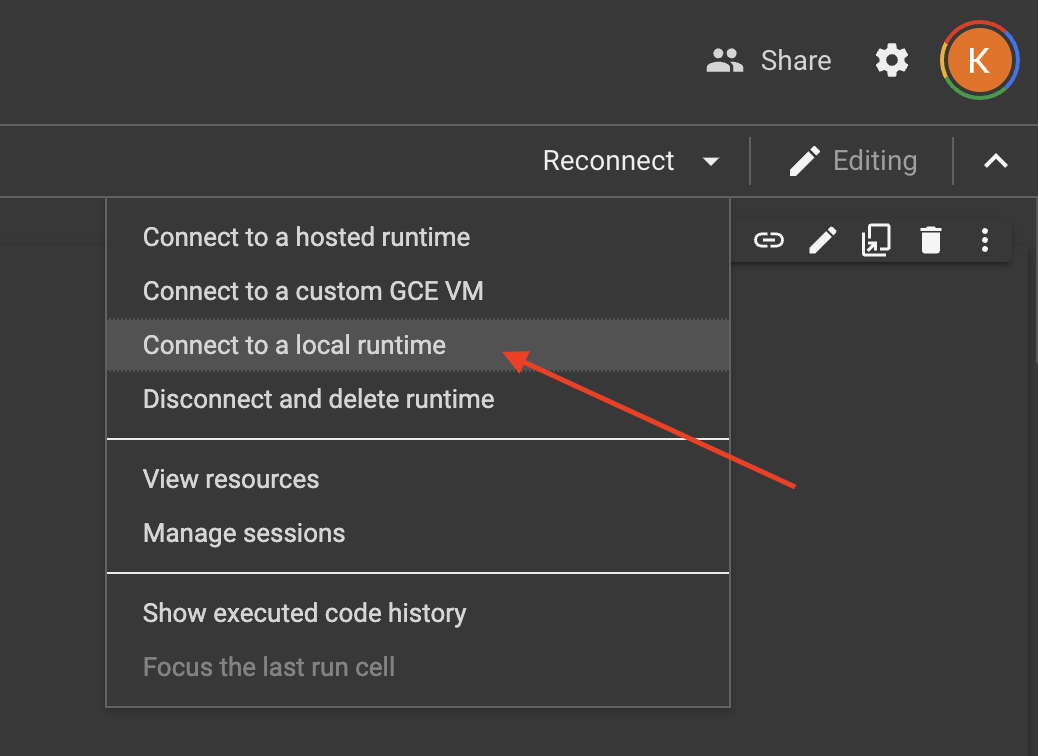
Now, in your Collab click “connect” and from the menu select “connect to a local runtime”. Here, set the address to http://localhost:8888/?token= with the token from the previous step:

And set it to http://localhost:8888/token=
Test the GPU
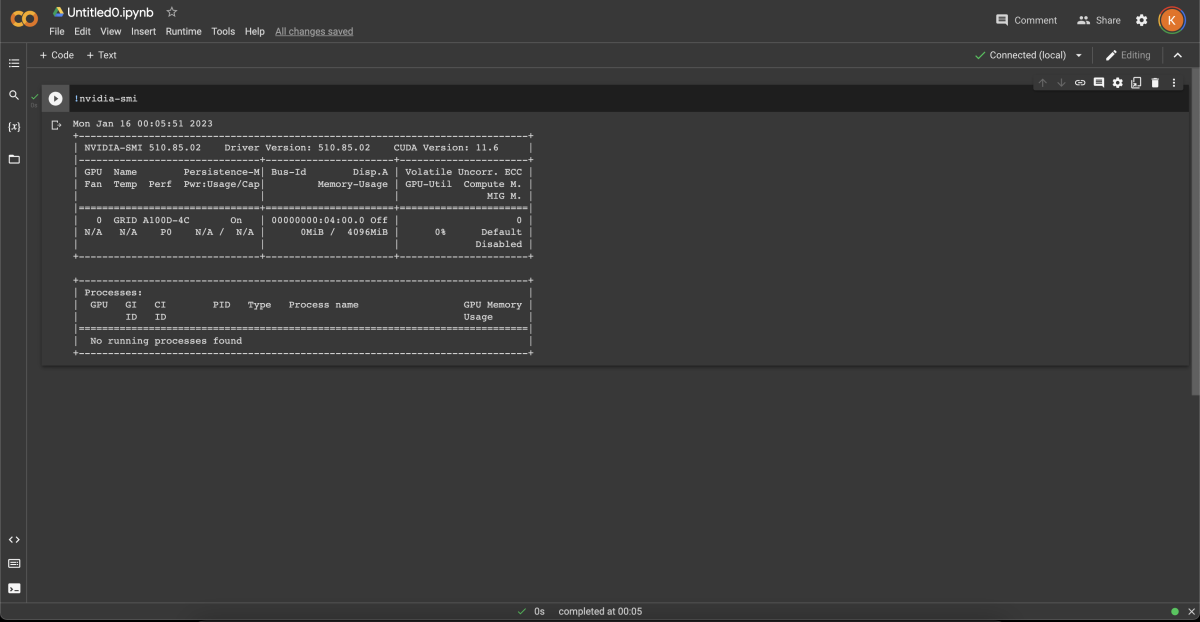
To test the GPU, we will use the nvidia-smi which is available on all NVIDIA GPU machines. In the notebook, run:
!nvidia-smi

That’s it :) Whenever you feel like you need a GPU on any cloud provider or on-prem, you can use Synpse to provision it and connect to it from Google Colab.
Tips and tricks
🤓 Reusing the app
Once you are done, just destroy the server through the Vultr console. You can leave the Synpse application deployed, we will try to set it up whenever you connect a new server. When you need to do some work on a cloud GPU again, just provision a new server and connect to it.
💻 SSH
To SSH to any machine that you can use synpse ssh <device name> command:

👯♂️ Teams and sharing
You can also invite your colleagues and team members to use the same GPU, just share the Synpse project with them. More information can be found here: https://docs.synpse.net/synpse-core/authentication/rbac.