In the previous blog post we showed how to expose an application with the free DuckDNS domain. This is a second article showing how to use a custom domain with a very similar application stack.
Important: This will not work if your devices are not able to be accessed via an external IP address. For this to work you might need to configure your router with a port forwarding. Which is out of scope for this blog post.
###Technologies used
- Synpse for hosting and running applications anywhere
- DDNS for managing DNS records for multiple DNS providers
- CloudFlare for hosting our DNS records
- Let’s Encrypt for TLS certificates
###Domain
In our case, we own a domain already. Section bellow shows how to integrate it with CloudFlare.
Firstly, you will need a custom domain. You can buy one from any domain provider of your choice.
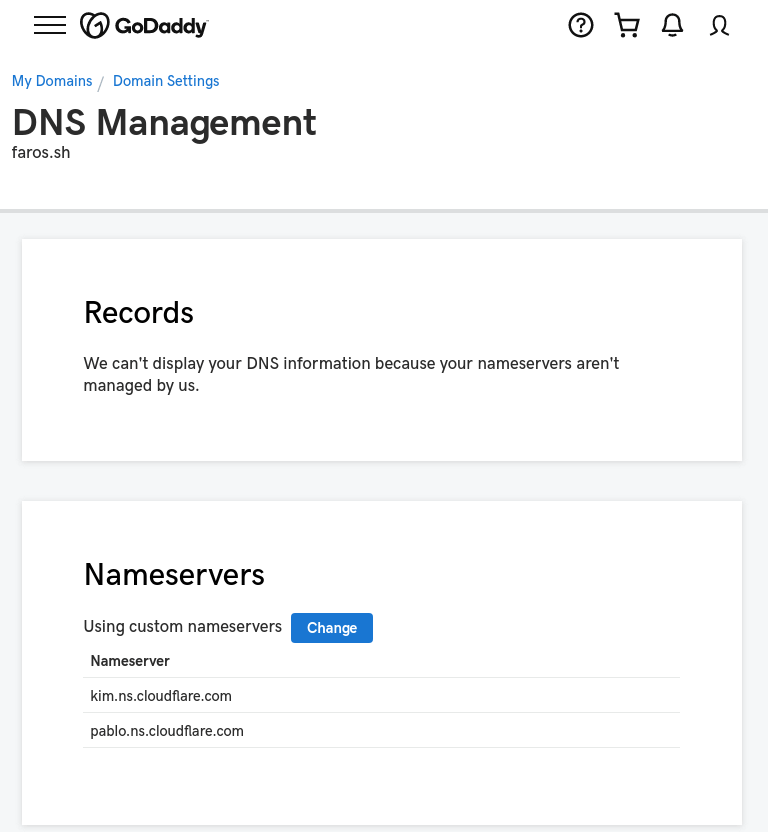
We used GoDaddy to acquire a domain faros.sh, but because DDNS do not support “GoDaddy” (shame on you!), we will manage all our DNS via “CloudFlare” (this is what everybody should be doing either way…). This is how it looks like on “GoDaddy” site:

We configure “GoDaddy” to point to the “CloudFlare” nameservers, provided to us when we onboarded the domain to the “CloudFlare”. Once you follow “CloudFlare” onboarding of the domain, you should be able to see it in the “CloudFlare” menu:

###Deploy basic application
As an application, we will use quay.io/synpse/hello-synpse-go “Hello World” application.
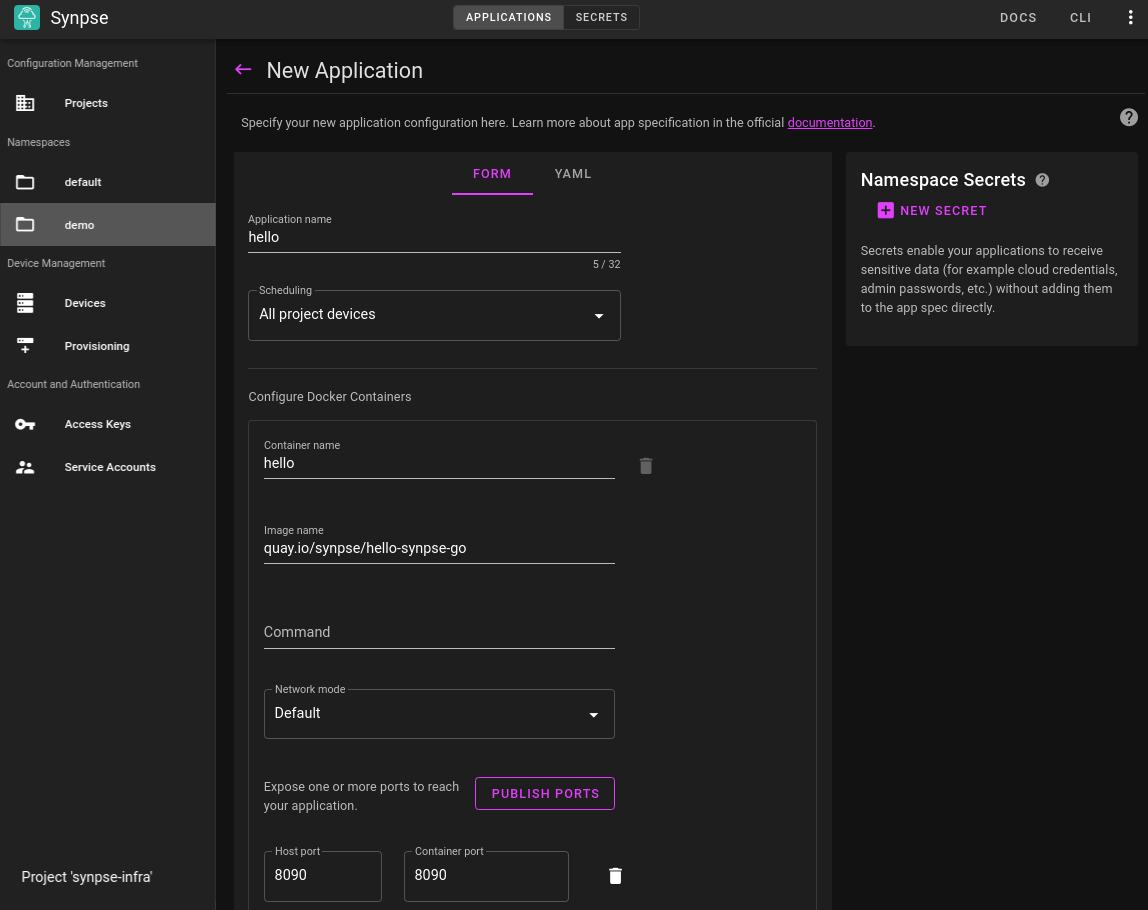
We are going to deploy the “Hello World” application alone for now:

As a yaml:
name: hello
scheduling:
  type: Conditional
  selectors:
    app: ddns
spec:
  containers:
    - name: hello
      image: quay.io/synpse/hello-synpse-go
      ports:
        - 8080:8080
We can access the application on our local network, but this is not our final goal:
$ curl 192.168.178.103:8080
<!DOCTYPE html>
<html lang="en">
  <head> </head>
  <body>
    <h1>Hello from Synpse</h1>

  </body>
</html>
###Extend an application with DDNS
We are going to use linuxserver docker image for DDNS client.
Create DDNS config for CloudFlare
If you are not using a custom domain - skip to next the section
We got the example from the command below. If you use a different provider, this is how you can get it out. We have prepared an example for you here below.
docker run linuxserver/ddclient ddclient --help | grep cloudflare -A 10
Our example config looks like this:
# /etc/ddclient/ddclient.conf
#
protocol=cloudflare
daemon=60
syslog=yes
ssl=yes
ttl=2
use=web
web=checkip.dyndns.org
server=api.cloudflare.com/client/v4
zone=faros.sh
login=[email protected]
password=9e64d21647xxxxxxxxxxxxxxxxxxxxxxx
faros.sh
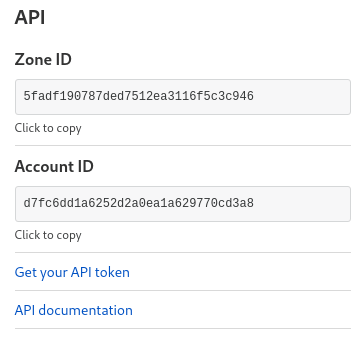
Where the API key is API key from CloudFlare:

Important: Make sure you add an API key NOT API TOKEN! DDNS not yet supports API Tokens!!!
Precreate DNS A name with the root (@) record in cloudflare
Once you have the config file created, create a secret for the config file using Synpse CLI:
synpse secret create ddns-config -f ddclient.conf
Extend “Hello world” application with DDNS image:
name: hello
scheduling:
  type: Conditional
  selectors:
    app: ddns
spec:
  containers:
    - name: hello
      image: quay.io/synpse/hello-synpse-go:amd64
      forcePull: true
      networkMode: default
      ports:
        - 8080:8080
    - name: ddns
      image: ghcr.io/linuxserver/ddclient
      env:
        - name: TZ
          value: Europe/London
        - name: PUID
          value: "0"
        - name: PGID
          value: "0"
      secrets:
        - name: ddns-config
          filepath: /config/ddclient.conf
Once these steps are done, we should have:
- Application deployed and exposed on port 8080;
- DDNS running and managing CloudFlare configuration.
In addition for this to look like an finished application, we want TLS certificates!
For this, we will add “Let’s Encrypt” container to the mix and we will use CertBot
###Let’s Encrypt with CloudFlare
Let’s create a configuration for “CertBot” (same credentials as in DDNS)
# Cloudflare API credentials used by Certbot
dns_cloudflare_email = [email protected]
dns_cloudflare_api_key = 9e64d21647xxxxxxxxxxxxxxxxxxxxxxx
Create a secret for CertBot using Synpse CLI:
synpse secret create cert-bot -f certbot.ini
We are going to create a small script to make sure renew the certificate on a periodic basis as certbot is not able to run as a daemon, which is required for containers:
#!/bin/sh

# Small hack script to renew "Let's Encrypt" certs each day
while [ : ]
do
    echo "Renewing Let's Encrypt certs"
    certbot certonly \
    --dns-cloudflare \
    --dns-cloudflare-credentials /run/secrets/certbot.ini \
    --email [email protected] \
    --dns-cloudflare-propagation-seconds=20 \
    --renew-by-default  \
    --agree-tos \
    # remove this if you are running tests. otherwise "Let's Encrypt" rate limit will ban you very fast!
    #--test-cert \
    -d faros.sh \
    -d www.faros.sh \
    -n

    echo "Sleeping for 7d"
    sleep 7d
done
synpse secret create script-cert-bot -f ddns/renew.sh
and extend our existing application. Note variables we added to the original application and change of port.
name: hello
scheduling:
  type: Conditional
  selectors:
    app: ddns
spec:
spec:
  containers:
    - name: hello
      image: quay.io/synpse/hello-synpse-go:amd64
      forcePull: true
      networkMode: default
      ports:
        - 443:443
      volumes:
        - /data/demo/letsencrypt:/etc/letsencrypt
      env:
        - name: TLS_CRT
          value: /etc/letsencrypt/live/faros.sh/fullchain.pem
        - name: TLS_KEY
          value: /etc/letsencrypt/live/faros.sh/privkey.pem
        - name: PORT
          value: :443
      restartPolicy: {}
    - name: ddns
      image: ghcr.io/linuxserver/ddclient
      env:
        - name: TZ
          value: Europe/London
        - name: PUID
          value: "0"
        - name: PGID
          value: "0"
      secrets:
        - name: ddns-config
          filepath: /config/ddclient.conf
      restartPolicy: {}
    - name: certbot
      image: certbot/dns-cloudflare
      command: /run/secrets/renew.sh
      entrypoint:
        - sh
      volumes:
        - /data/demo/letsencrypt:/etc/letsencrypt
        - /data/demo/var-lib-letsencrypt:/var/lib/letsencrypt
      secrets:
        - name: cert-bot
          filepath: /run/secrets/certbot.ini
        - name: script-cert-bot
          filepath: /run/secrets/renew.sh
      restartPolicy: {}
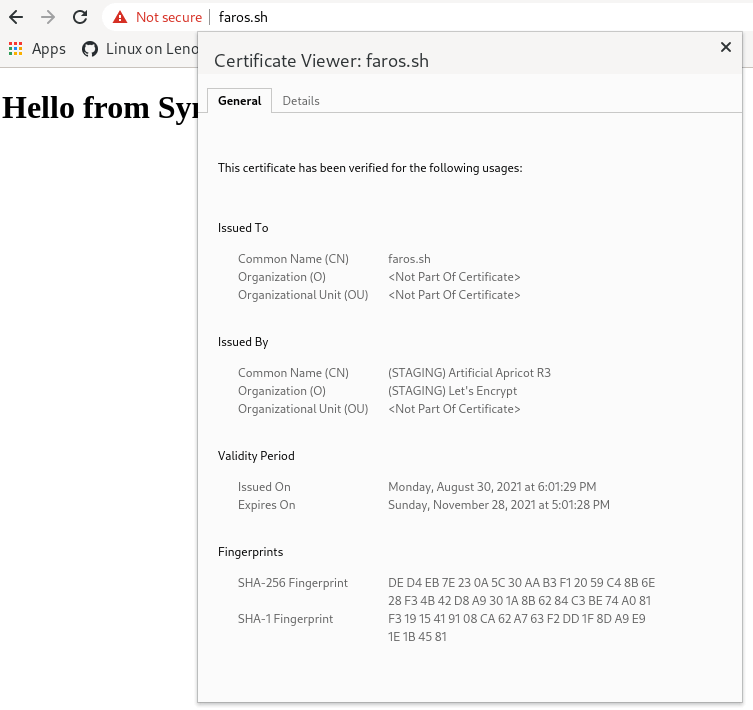
Once the application is updated, rolled out and all components are running you should be able to see this:

We used development “Let’s Encrypt” mode so the certificate is showing as not valid.
./wrap_up.sh
This shows one more way to expose your application to the outside world. This can be used for any other applications like “Drone”, “Prometheus”, “Grafana”. We will use this pattern in the future to show how you can deploy other applications!
If you have any questions or suggestions, feel free to start a new discussion in our forum or drop us a line on Discord