
Simple and common use case - deploy updated application versions on git push to GitHub. In this short tutorial we will demonstrate you how to use Synpse GitHub action to keep your application spec versioned and easily maintainable. We will deploy a relatively popular app for serving websites called Wordpress :)
###Prerequisites
- Synpse account - manage deployment
- Docker - we will package our application as a Docker container
- provision Synpse to at least one device, instructions: https://docs.synpse.net/synpse-core/devices/provisioning
###Step 1: Create the application deployment spec
Example of the application can be found here https://github.com/synpse-hq/push-to-deploy-example. Here’s the spec:
name: wordpress
scheduling:
  type: Conditional
  selectors:
    type: controller # Adjust based on how you label your device
spec:
  containers:
    - name: wordpress
      image: wordpress:latest
      ports:
        - 9888:80
      env:
        - name: WORDPRESS_DB_HOST
          value: "db"
        - name: WORDPRESS_DB_USER
          value: "wordpress"
        - name: WORDPRESS_DB_PASSWORD
          value: "wordpress"
        - name: WORDPRESS_DB_NAME
          value: "wordpressdb"
      volumes:
        - /data/wordpress:/var/www/html
    - name: db
      image: mysql:latest
      volumes:
        - /data/wordpress-mysql:/var/lib/mysql
      env:
        - name: MYSQL_ROOT_PASSWORD
          value: "very-secret"
        - name: MYSQL_DATABASE
          value: "wordpressdb"
        - name: MYSQL_USER
          value: "wordpress"
        - name: MYSQL_PASSWORD
          value: "wordpress"
###Step 2: Setup GitHub action
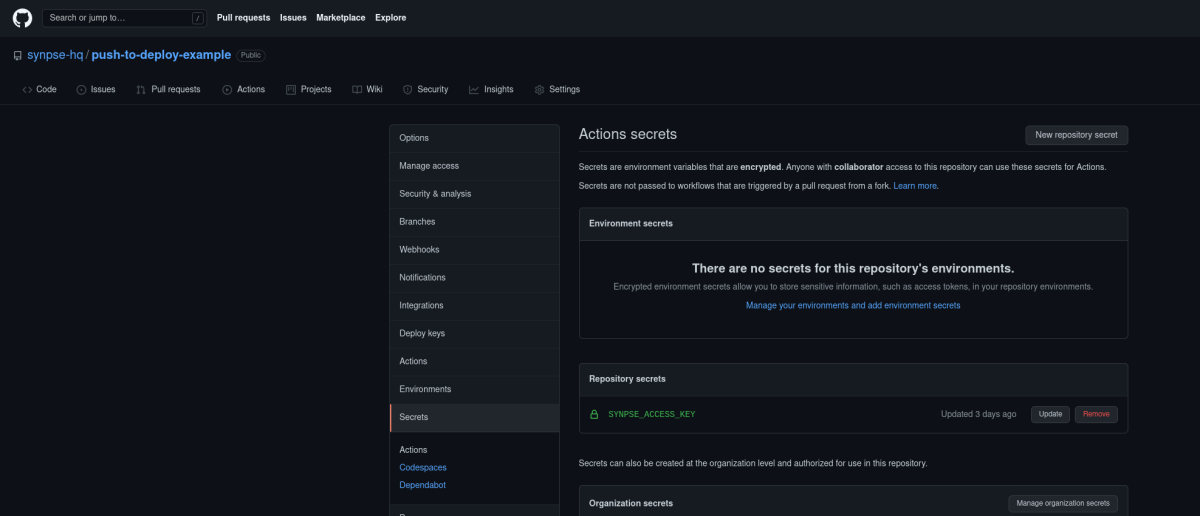
We will need a way to authenticate to Synpse. Go to the service accounts page here: https://cloud.synpse.net/service-accounts and create a new one. Once created, you will need to create a secret named SYNPSE_ACCESS_KEY in your GitHub repository’s “Secrets” section:
And then add the .github/workflows/main.yml to your repository (example here):
on: [push]

jobs:
  deploy-app:
    runs-on: ubuntu-latest
    name: Synpse application update
    steps:
      - name: Checkout
        uses: actions/checkout@v1
      - name: Deploy or update application to Synpse
        id: hello
        uses: synpse-hq/action@v1
        with:
          key: ${{ secrets.SYNPSE_ACCESS_KEY }}
          project: karolis-homelab # Your project name
          namespace: default       # Namespace (we create 'default' with each project but you can have your own here)
          filepath: app.yaml       # Path to the spec as the same repository could have many Synpse manifests
###Step 3: Push to GitHub
Once you push to GitHub, it will start running the workflow and your application will be deployed:

Next steps
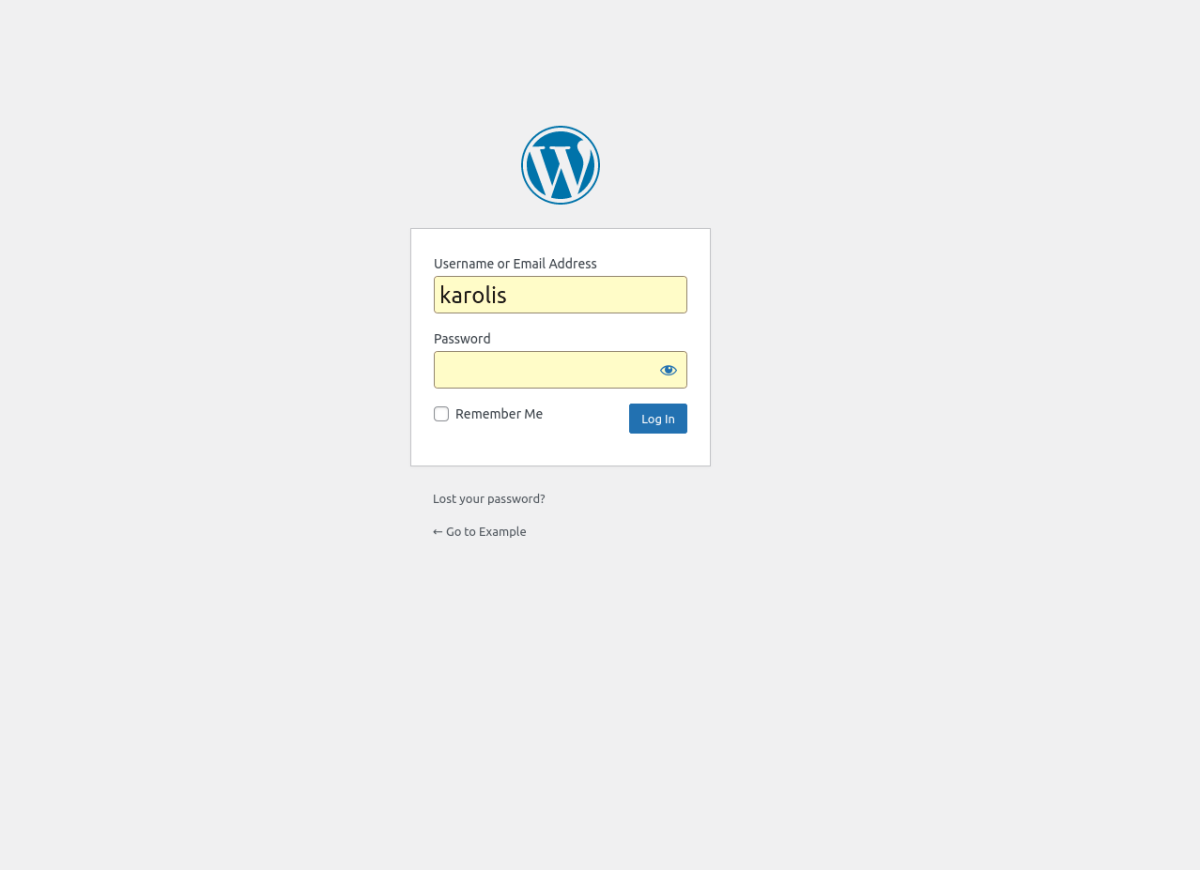
As with any deployed applications, next step would be to login. In this example we deployed a Wordress website backed by a MySQL database:
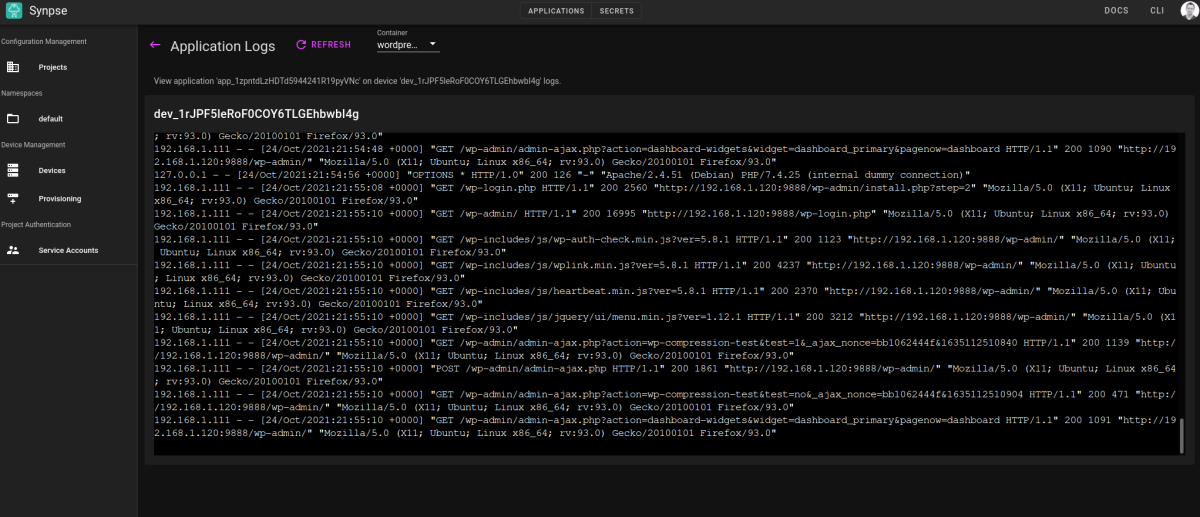
We can also view logs of the application in Synpse:
You can always update ports, change env variables or add more containers to the spec just by pushing to GitHub. To expose your application properly to the internet, consider using Caddy (there’s a simple example available here)
Troubleshooting
If your device has used up DockerHub’s image pull quota, you might need to add authentication details so Synpse can pull the images. In that case, add auth section next to each container with your username and also create a secret in the same namespace dockerPassword with your API token or password.
  ...
  containers:
    - name: wordpress
      auth:
        username: <your username>
        fromSecret: dockerPassword
  ...
