The use of artificial intelligence and machine learning is rapidly growing in a variety of industries, and with this growth comes the increased demand for high-performance computing resources. One option for powering these workloads is the use of GPU servers, which are specialized machines that are optimized for running complex computations quickly. However, the costs of using GPU servers can add up quickly, especially if you are running them for an extended period. Fortunately, there are ways to save money on GPU servers by taking advantage of the many options available on the cloud. In this post, we will explore some tips for getting started with GPU servers on a budget, and show you how to save big on cloud computing costs.
Which cloud provider to choose?
There are quite a few cloud providers that offer GPU machines. All mainstream ones do it - AWS, Google Cloud, Azure. The only downside is that it can get really expensive.
For example, AWS p4de.24xlarge (96vCPU, 8xA100) costs $40.96 per hour, while on Vultr we get a similar machine for $20.833 per hour. That’s a 50% discount!
If you have concerns about capacity, don’t worry too much as AWS doesn’t have the good capacity of these high-end machines either so it’s mostly a waiting game anyway.
What’s this guide about?
This guide is about setting up a GPU server on Vultr using Cloud-Init. Cloud-Init is a tool that allows you to configure a server on boot. It’s a great way to automate the server setup process. This also means that you can use the same strategy to create and manage machines in most cloud providers as all of them support this type of configuration.
Benefits of using Synpse:
- You can have a mix of machines, some in Cloud, some on-premises, managed the same way
- Collaboration with other teams, grant and revoke access to machines easily
- Run workloads on machines with different hardware configurations
- Host long-running applications and services
Setting up a GPU server on Vultr
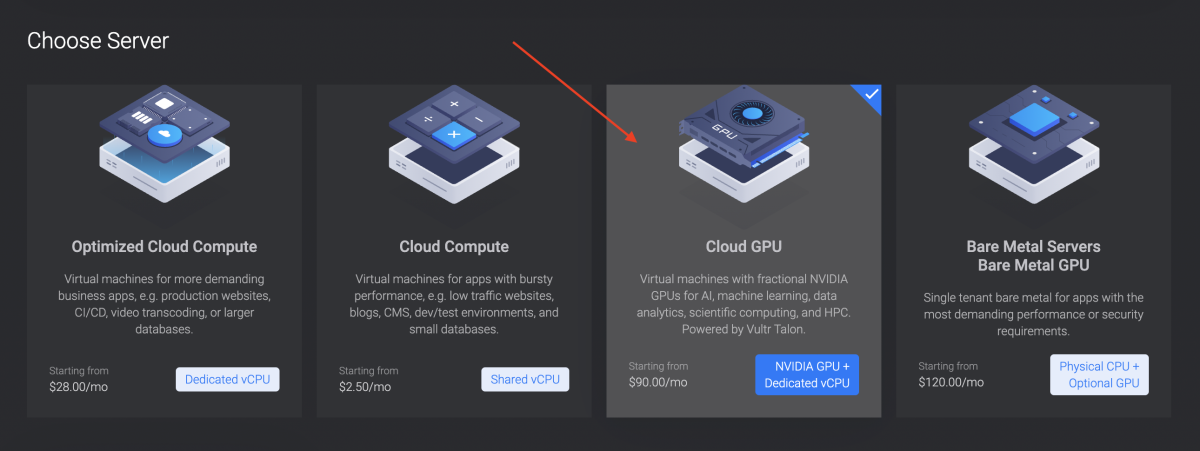
The first step is to create a Vultr account. Once there, go to the product selection and pick a Cloud GPU server:
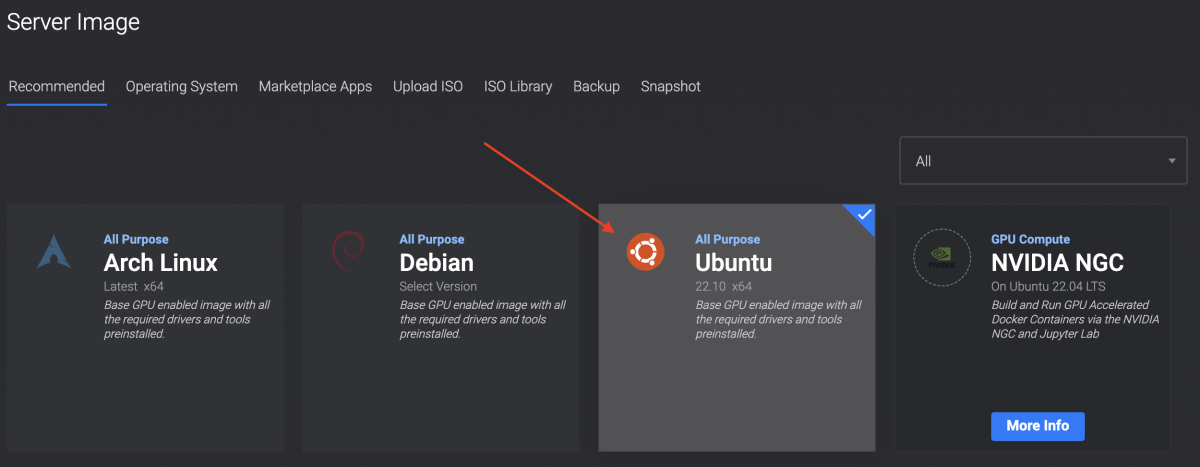
For the OS, while you could try different ones, probably the most popular one that the majority of people use is Ubuntu. So let’s go with that one:
Get your Synpse device provisioning token
To add machines to your Synpse account, you need to get a provisioning token. You can get it from the Synpse dashboard. First, head to the provisioning page:
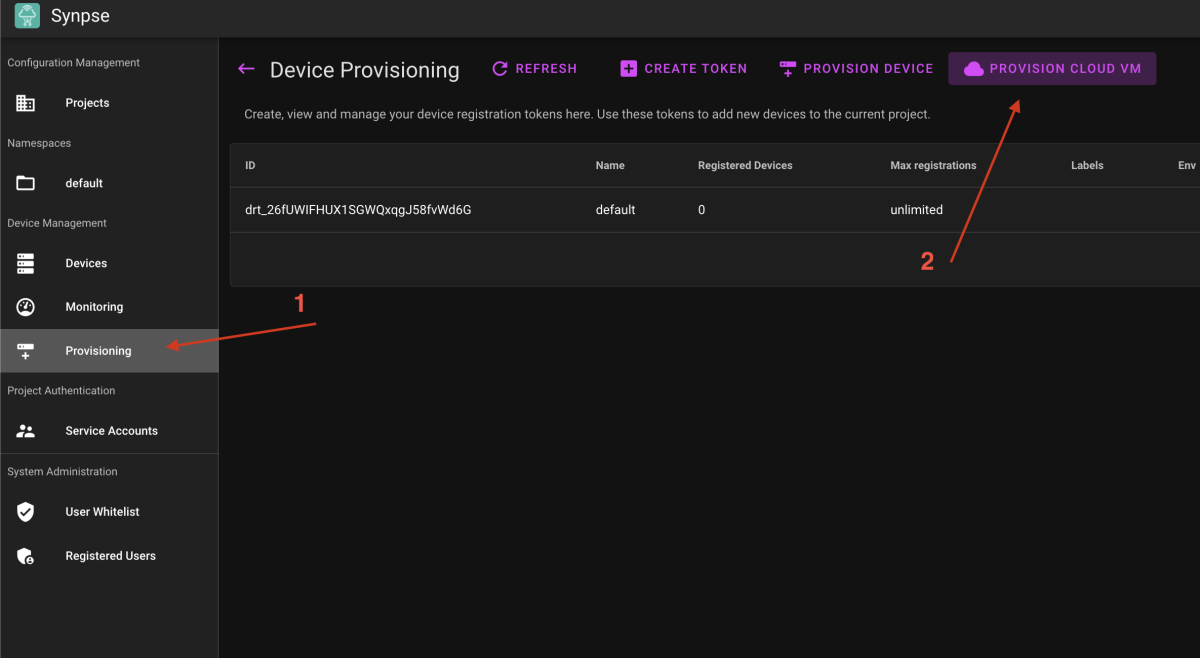
Get your registration token:
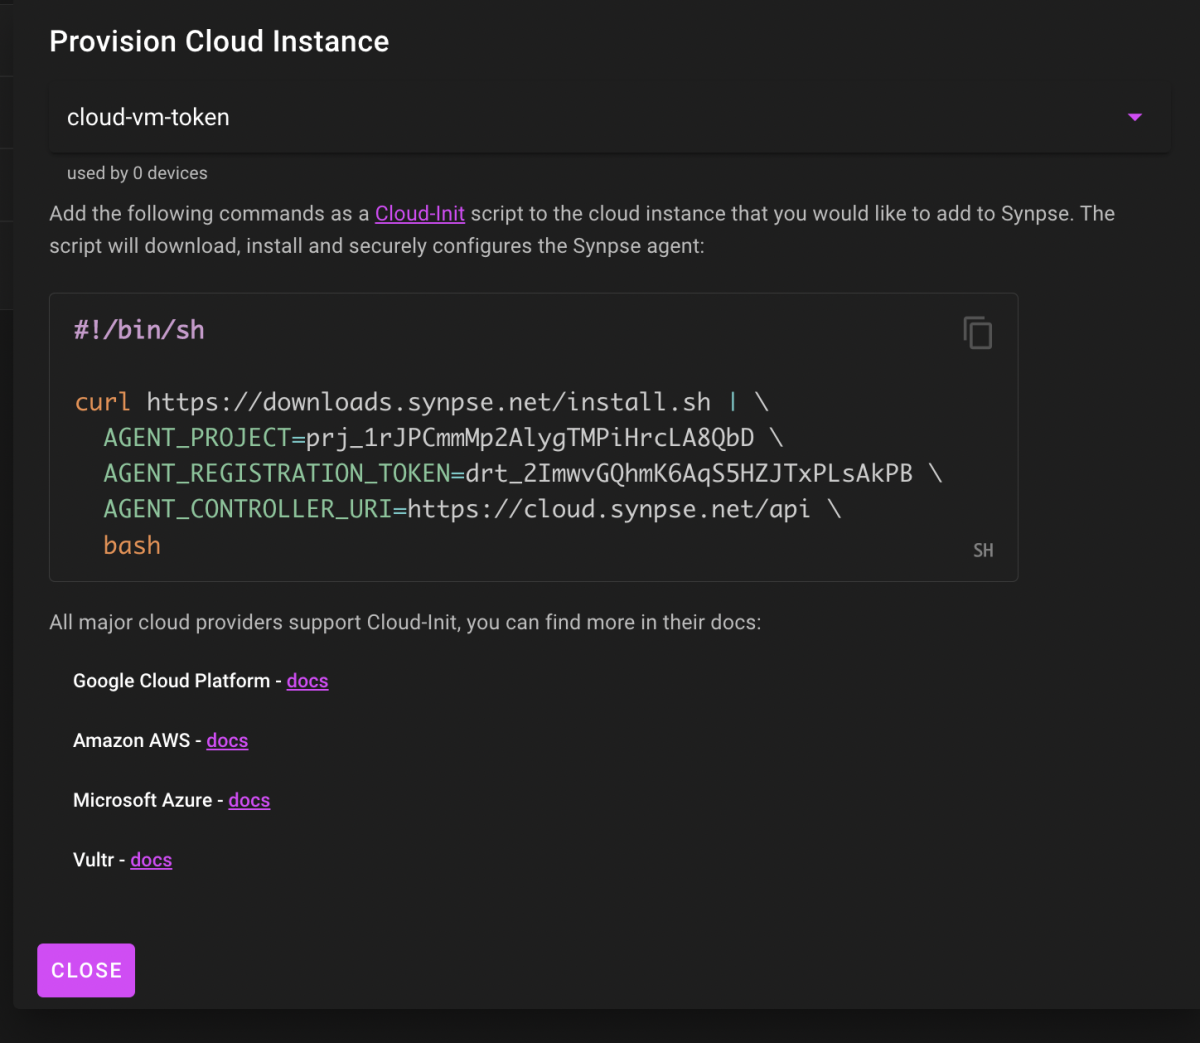
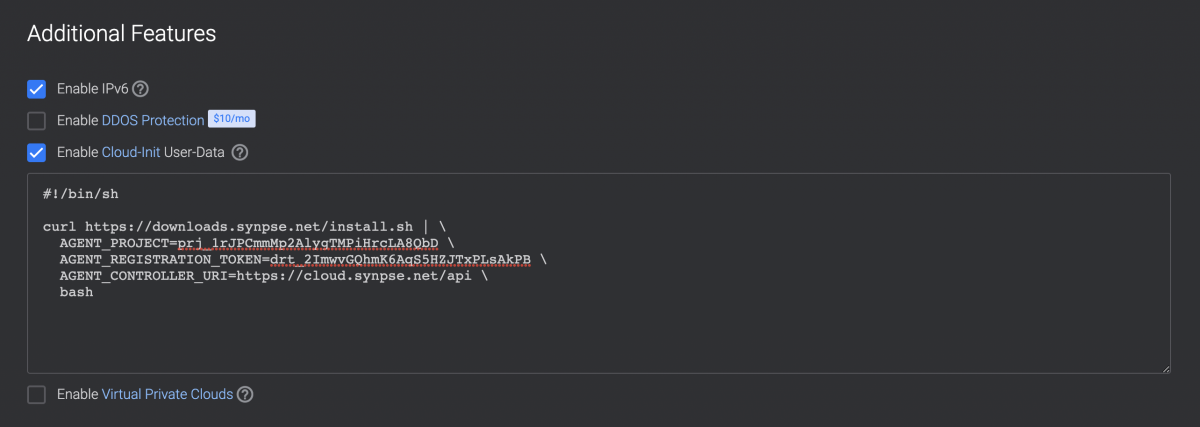
Then, back in Vultr “Additional Features” section click on “Enable Cloud-Init User-Data” and paste the command from the Synpse:
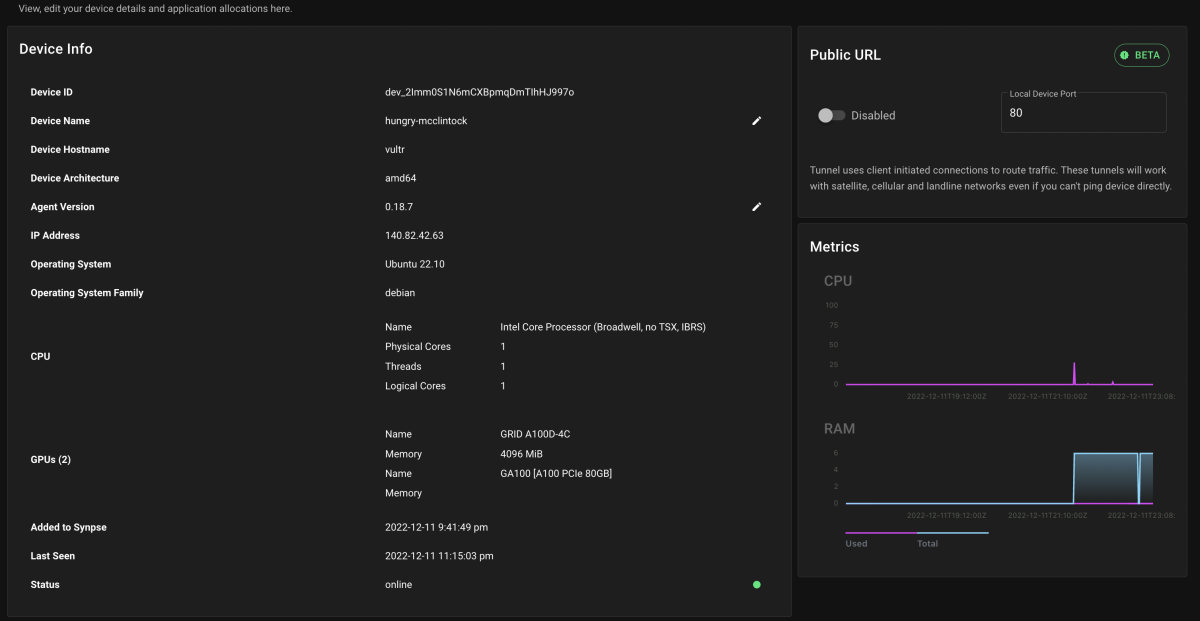
Once created, wait till it boots (it can take several minutes for the server to come up online), then you can view device details:
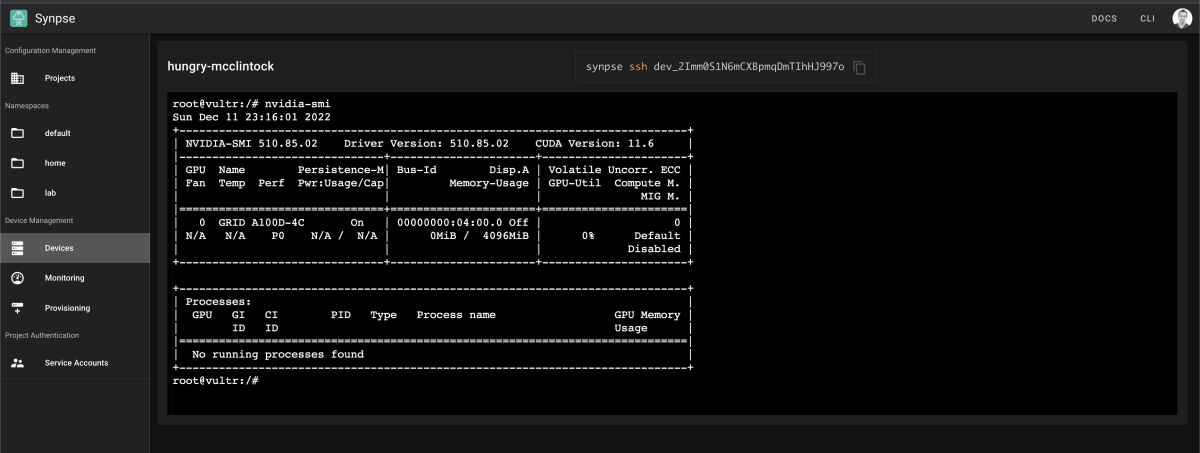
Through the dashboard, you can also SSH into the server. Let’s check out the nvidia-smi info:
What’s next?
In the next article, we will look into running GPU workloads on machines managed by Synpse. Stay tuned! :) If you have any questions, feel free to reach out to us on Twitter or Discord.